 BEFORE | 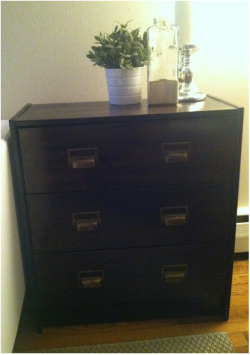 AFTER |
I am a lover of Ikea Hacks. An “Ikea Hack” is when a person takes a piece of Ikea furniture and re-purposes it to put their own spin on it. As I am slightly obsessed with Pinterest, slightly obsessed with Ikea, and slightly obsessed with redoing furniture, this just seemed right up my alley. One of my favorite hacks is with the Ikea Rast 3-drawer dresser. I have seen several variations of this hack, so I decided to try my own.
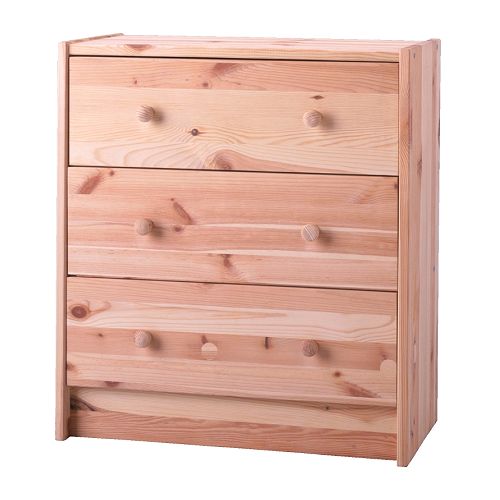
I think the reason this hack is so popular, is the price. The Rast 3-Drawer Dresser comes to a whopping $35. This means that if you royally screw up your hack, you really don’t have a whole ton of money invested. I knew I wanted to turn these dressers into end tables for my living room. With the assistance of my lovely brother and sister-in-law, I picked up two and got to “hack”ing.
I think the reason this hack is so popular, is the price. The Rast 3-Drawer Dresser comes to a whopping $35. This means that if you royally screw up your hack, you really don’t have a whole ton of money invested. I knew I wanted to turn these dressers into end tables for my living room. With the assistance of my lovely brother and sister-in-law, I picked up two and got to “hack”ing.
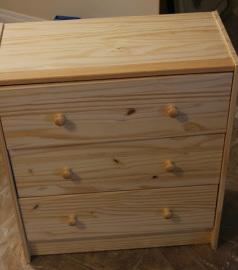
I began by staining my dressers. They come in a very basic wood finish, so there isn’t much prior prep needed. I used a pre-stain on my first dresser, and honestly forgot to use it before starting to stain my second dresser. I actually like the dresser without the pre-stain better, but it’s totally up to you
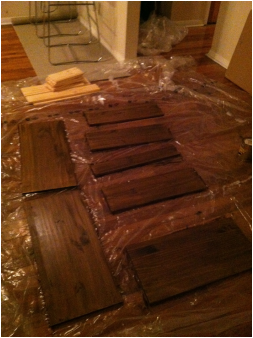 | 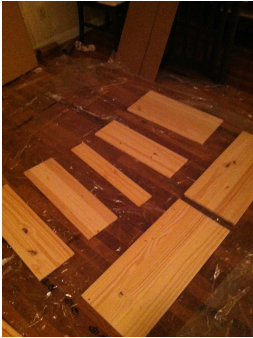 |
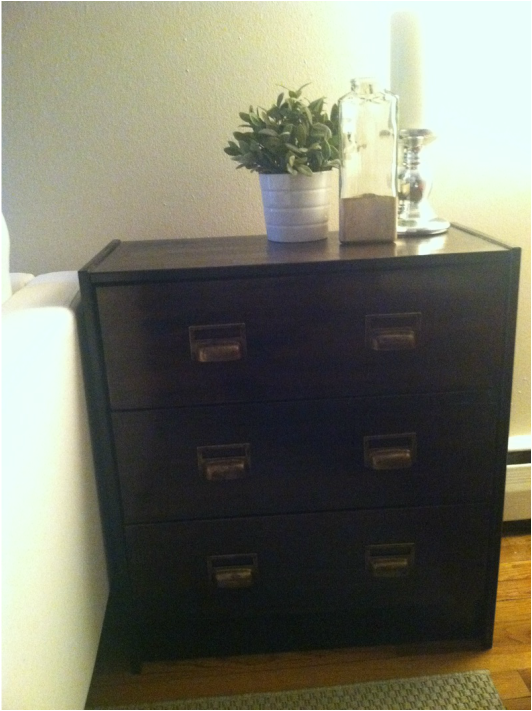
Staining was quite the process. It was nice that the dresser did not come assembled as I was able to lay everything out to stain evenly. However, it is a little bit of a puzzle figuring out which pieces need to be stain, and what sides of each piece need to be stained. With most of the boards, you can simply stain the side that is showing, however, the side pieces have about an inch around the perimeter of the backside that can be seen. (I did not discover this until after my first dresser was assembled.) I applied probably 5 coats of stain to each dresser. I would get excited after each stain, thinking “this will be my last.” I would come back 6 hours later and realize I needed just “one more coat.” If you are repeating this project, you might not need as many coats as I used, depending on how dark you want the dressers to be. (I used Minwax Poly Shades Stain and Polyurethane Espresso stain.)

After I finished staining, and my wonderful husband finished assembling (thanks Philip!), I found these gorgeous card frame pulls at Lee Valley to put on my dressers.
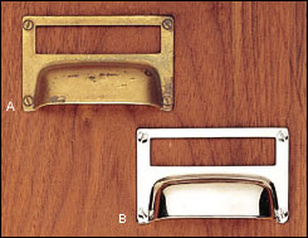
I loved the pulls, the only annoying part was that we had to drill a new hole for each pull in the dresser. This was a frustrating process. Each time we would think we had drilled the hole “just right”, we would be slightly off and the screw wouldn’t fit. After my husband cursed the day I ever decided to do this project a couple hundred times under his breath, we finally got each handle attached.
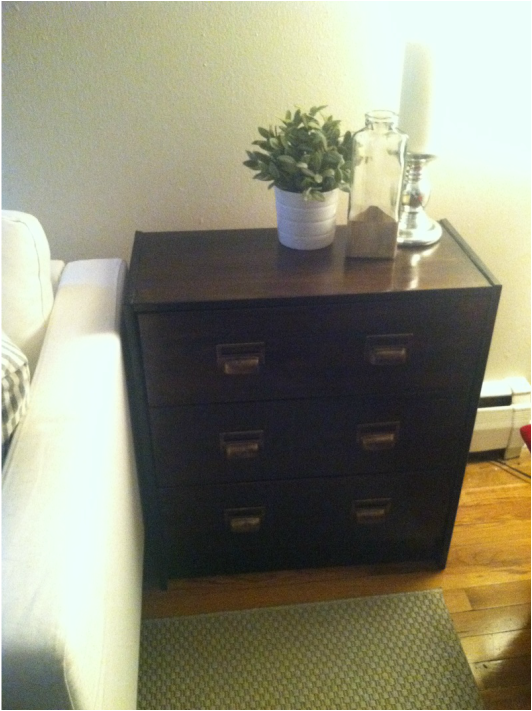
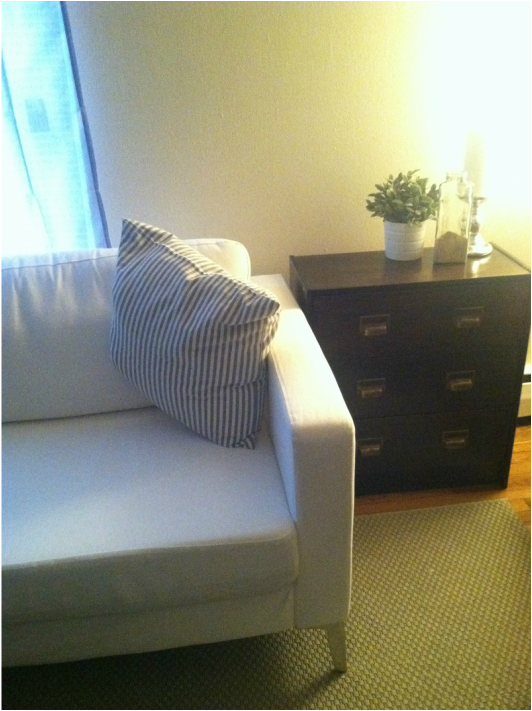
I really like how the dressers turned out and think the work was entirely worth it. (You’d have to ask my husband if he feels the same way.) I love the idea of using dressers as end tables because, in our small apartment, you can use every inch of storage you can find.

 RSS Feed